DIY Lean-To Shed Build: How to Construct a Simple and Affordable Shed
This comprehensive guide details the process of constructing a lean-to shed, a cost-effective and relatively straightforward building project ideal for novice DIY enthusiasts. A lean-to shed, attached to an existing structure such as a house or garage, maximizes space utilization and minimizes material costs compared to freestanding sheds. This guide provides a step-by-step approach, covering material selection, foundation preparation, framing, roofing, and finishing touches. Careful planning and adherence to safety protocols are crucial for a successful outcome.
Phase 1: Planning and Material Acquisition
The foundation of any successful DIY project lies in meticulous planning. Before purchasing any materials or commencing construction, a detailed plan is essential. This includes determining the shed's dimensions, desired features, and material selection. Accurate measurements are paramount, as errors at this stage can lead to significant complications later on.
Determining Shed Dimensions and Location
The size of your lean-to shed will depend on your storage needs and the available space against the existing structure. Consider the maximum allowable size based on local building codes and regulations. Carefully measure the available wall space of the building you are attaching the shed to. Document these measurements precisely, including the height from the ground to the roofline of the existing structure. This height will determine the overall height and slope of your lean-to roof.
Material Selection and Quantity Calculation
Choosing the right materials is vital for both the structural integrity and longevity of your shed. Pressure-treated lumber is recommended for the frame to resist rot and insect infestation. Consider using durable roofing materials such as asphalt shingles or metal sheeting. For siding, options include plywood, vinyl, or corrugated metal. Before purchasing, calculate the precise quantity of each material required based on your detailed measurements. Consider adding a 10% buffer to account for potential cuts and waste.
Material List Example (for a small lean-to):
- Pressure-treated 4x4 posts for the foundation
- Pressure-treated 2x4 lumber for framing
- Plywood or OSB sheathing for walls and roof
- Asphalt shingles or metal roofing
- Siding material of your choice
- Concrete mix for the foundation (if needed)
- Nails, screws, and other fasteners
- Weatherstripping
- Paint or stain (optional)
Phase 2: Foundation Preparation and Construction
A stable foundation is crucial for a long-lasting and safe shed. The type of foundation required will depend on several factors, including soil conditions, shed size, and local building codes. For a smaller lean-to, a simple concrete slab or pier foundation may suffice. For larger structures, a more robust foundation might be necessary.
Leveling the Ground
Begin by clearing the area where the shed will be built, removing any vegetation, debris, or loose soil. Use a level to ensure the ground is completely level. Any significant unevenness needs to be addressed by excavating and filling as needed, compacting the soil thoroughly to prevent settling.
Concrete Slab Foundation (Optional)
If using a concrete slab foundation, excavate a shallow trench to the desired depth. Add a layer of gravel for drainage, followed by a layer of compacted sand. Construct the formwork using plywood or other suitable material. Pour the concrete, ensuring it is level and free of air pockets. Allow the concrete to cure completely before proceeding to the next stage.
Pier Foundation (Alternative)
Alternatively, a pier foundation provides a cost-effective and relatively simple solution. Dig holes at designated locations, ensuring they are deep enough to provide adequate support. Fill the holes with concrete, allowing them to set before proceeding to the framing stage. Ensure the piers are level and positioned correctly for the framing structure.
Phase 3: Framing the Shed
The framing forms the structural skeleton of your lean-to shed. Accurate measurements and precise cuts are crucial for a square and stable structure. Use pressure-treated lumber for the framing to enhance durability and resistance to the elements.
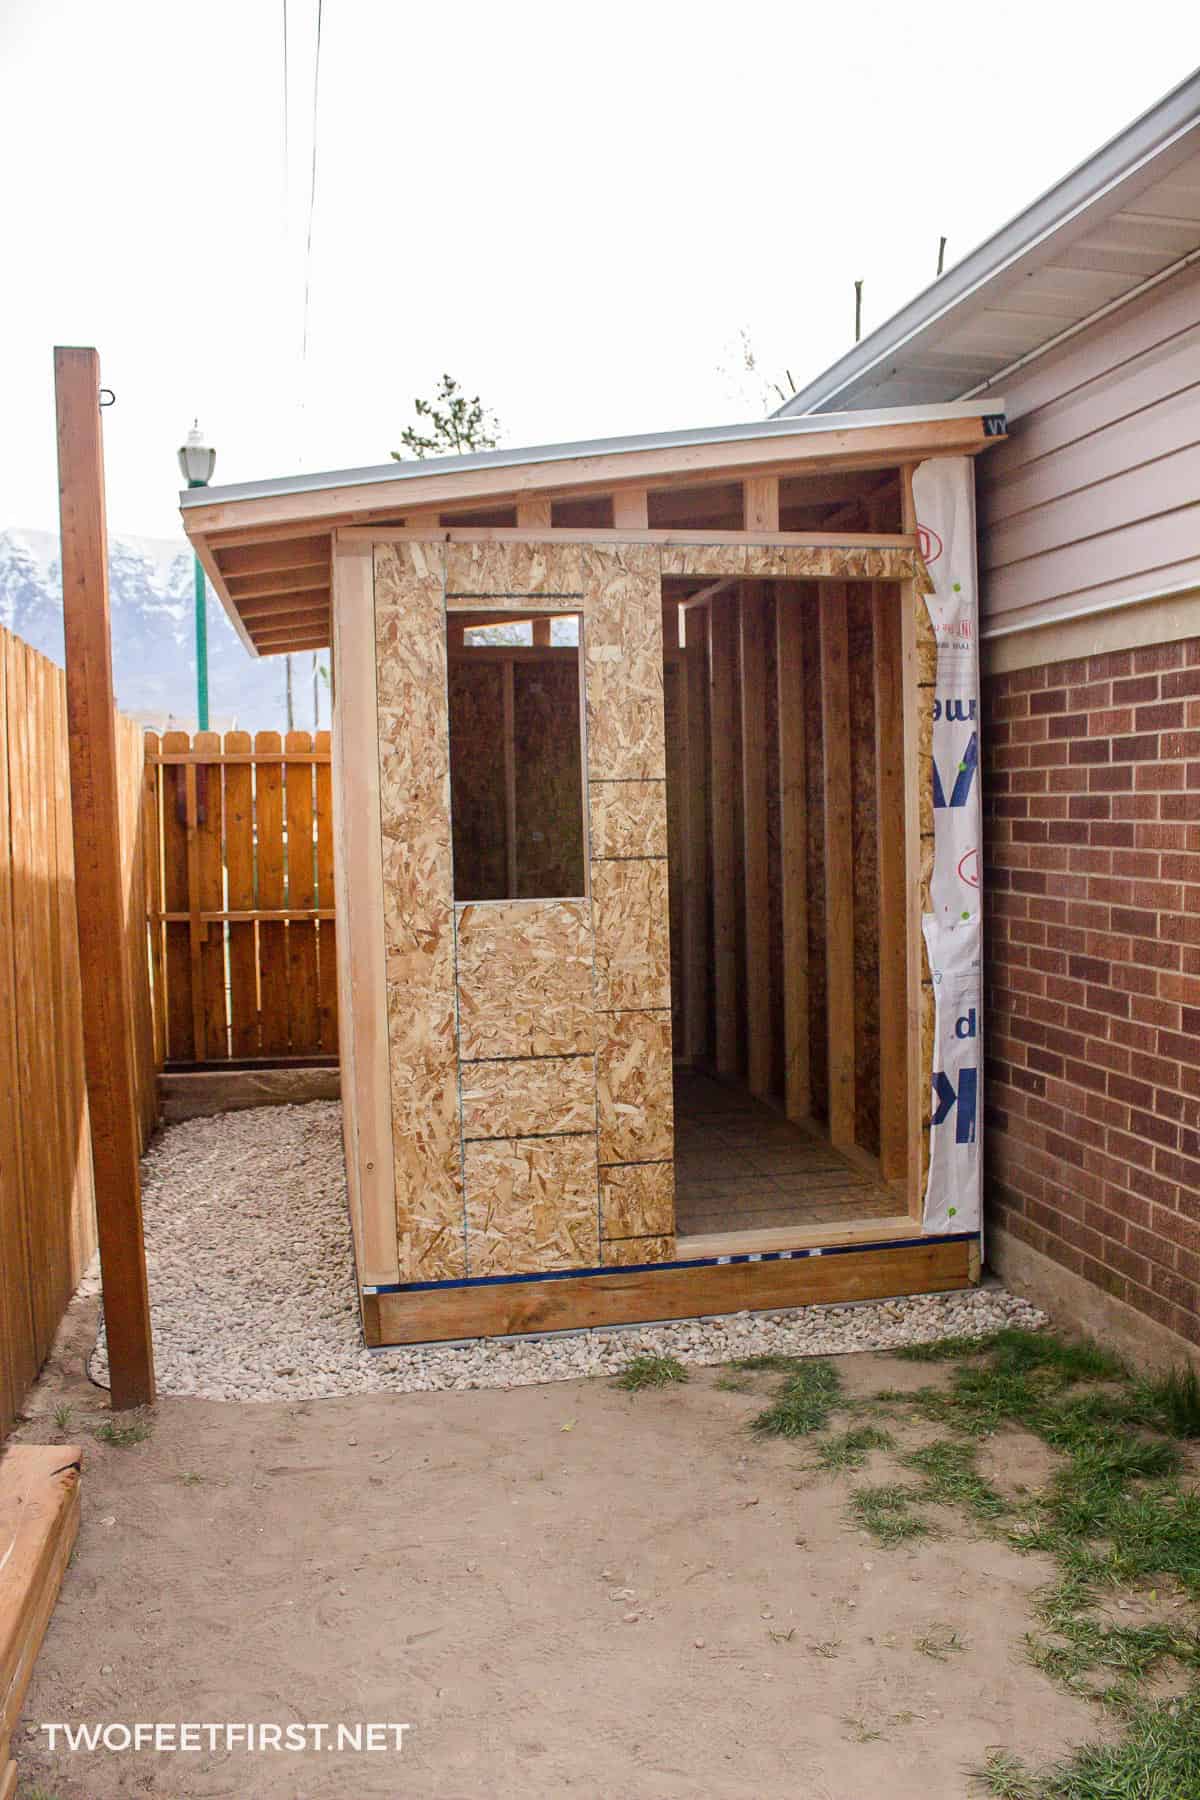
Constructing the Frame
Begin by attaching the bottom plate to the existing structure and the foundation posts. Then, erect the vertical studs, ensuring they are plumb and spaced evenly. Attach the top plate to complete the wall frame. For the roof framing, use rafters angled appropriately to achieve the desired roof slope. Secure the rafters to the top plate and the existing structure's roofline. Remember to use appropriate fasteners and bracing to ensure stability.
Adding Wall Bracing
For added strength and stability, incorporate diagonal bracing between studs. This will prevent racking and improve the overall structural integrity of the shed. Ensure proper placement and secure fastening of these braces.
Phase 4: Roofing and Siding
Roofing and siding are crucial for weather protection and aesthetics. Choose durable and weather-resistant materials for optimal performance. Ensure proper installation to prevent leaks and damage.
Roof Installation
Begin by installing sheathing over the rafters. This provides a solid base for the roofing material. Then, install the chosen roofing material, following the manufacturer's instructions carefully. Ensure proper overlap to prevent leaks. For asphalt shingles, use appropriate underlayment to protect the sheathing from moisture.
Siding Installation
Once the roof is complete, install the siding material, again following the manufacturer's instructions. This will protect the walls from the elements and provide a finished aesthetic. Use appropriate fasteners to secure the siding to the framing.
Phase 5: Finishing Touches and Safety Considerations
Adding finishing touches enhances the functionality and aesthetics of the shed. Consider adding a door, windows, and interior shelving for improved storage and organization. Safety is paramount throughout the entire construction process. Always wear appropriate safety gear, including safety glasses, gloves, and hearing protection.
Adding a Door and Windows
Install a door and windows of your choice, ensuring proper weather sealing to prevent drafts and leaks. Consider adding extra security features such as a strong lock and hinges.
Interior Shelving and Finishing
Install interior shelving to maximize storage space. Consider painting or staining the interior and exterior for added protection and aesthetic appeal. Ensure any electrical work is done by a qualified electrician.
Safety Precautions
Always follow safe work practices. Use appropriate safety gear and ensure the work area is free from hazards. Dispose of waste materials responsibly. Inspect the structure regularly to ensure its stability and make necessary repairs promptly. Comply with all local building codes and regulations. Never work at heights without appropriate safety equipment and training.
Building a lean-to shed is a rewarding DIY project. By following these detailed steps and prioritizing safety, you can construct a functional and aesthetically pleasing addition to your property, providing valuable storage space at a minimal cost. Remember that thorough planning and attention to detail are key to success.